


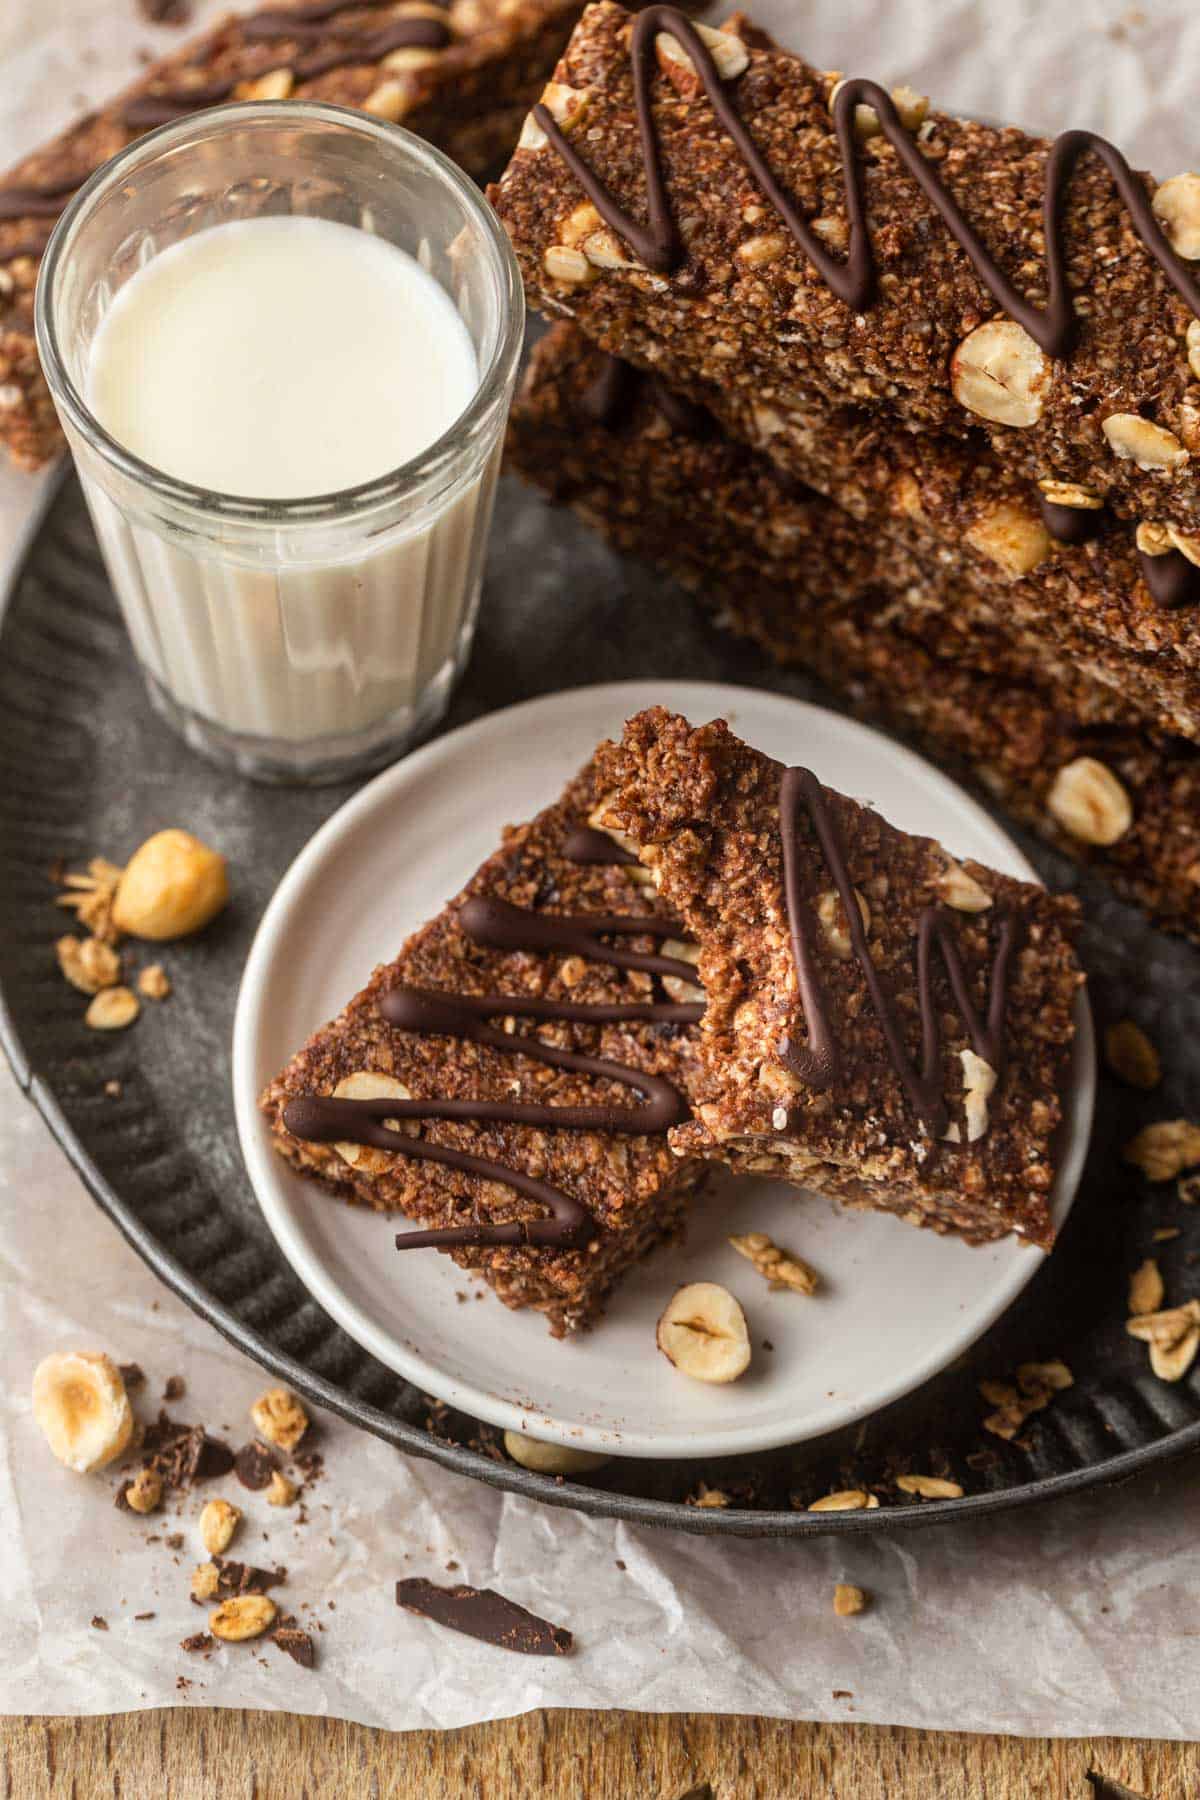
These Chocolate Granola Bars combine the perfect natural sweetness of dates and maple syrup with the textural crunch from oven-baked oats and toasted hazelnuts. They're wholesome with a teeny bit of indulgence. Winning!

My kids love granola bars, but they can be packed full of extra ingredients that aren’t particularly great. These hazelnut bars include wholesome grains, healthy fats, and natural sweeteners.
Filled with oats, dates, hazelnuts, and maple syrup, these chewy chocolate bars are nothing short of delicious! Soft, rich, dense, and moist, they tick all the boxes. Bonus that they're gluten-free and vegan too.
For more snack recipes you and your kids will love, check out my Banana Oatmeal Chocolate Muffins, Strawberry Shortcake Bark, Date and Walnut Cake, or Mary Berry's Banana Bread Recipe. They're all delicious!
🌟 Why You'll Love This Recipe
- Uses basic ingredients. All ingredients in these chewy chocolate bars are basic pantry items or easily be found in your local supermarket.
- They are totally customizable. Make them suit your taste by using different add-ins such as nuts, seeds, dried fruit, and chocolate.
- Simple to make. Aside from toasting the oats and nuts (optional), these hazelnut chocolate bars are no-bake and made in a few easy steps.
- Satisfying snack. With whole grain oats, protein and healthy fats from the nuts, and natural sweetness from the dates and maple syrup, you’ll feel great after tucking into one of these bars.
🧾 Ingredients Needed
With just a handful of delicious ingredients in these homemade Hazelnut Chocolate Bars, you have yourself a perfect snack. Let’s dive into a couple of points.

- Rolled oats - I toasted the oats as I believe it adds flavour and texture to the bars. It gives the bars an ever-so-slight crunch. If you prefer soft bars, then omit toasting the oats.
- Hazelnuts - Just like with the oats, I’ve toasted the nuts, which accentuate the nutty flavour but is also an essential step if they have their skins on. You can also buy skinned and toasted hazelnuts for ease.
- Peanut butter, dates and maple syrup - All three of these ingredients form the paste that helps bind together the nuts and oats, creating cohesive bars that aren’t dry and crumbly.
📖 Variations
- Nuts: Leave out the nuts altogether or use your favourites such as almonds, walnuts, pecans, brazil nuts, and macadamia nuts.
- Dried fruit: If you fancy little morsels of chewiness throughout, then add in chopped dried cranberries, cherries, apricots, or figs.
- Nut butter: Swap out the peanut butter for your fave nut butter. Almond butter, cashew butter, and hazelnut butter would all be delicious in these bars.
- Extra add-ins: You can add 2 tablespoons of flaxseeds into the mix or add a more robust chocolate flavour and add in chocolate chips. Dark (bittersweet) is best as these chocolate oatmeal bars are sweet enough.
The chocolate-hazelnut combination of flavours is incredible (here's looking at you, Nutella). If you're a major fan like me, then be sure to check out my Chocolate Hazelnut Semifreddo, Chocolate Hazelnut Cookies and Chocolate Hazelnut Christmas Bûche de Noël.
👩🏻🍳 How to Make Chocolate Granola Bars
*Be sure to see the recipe card below for the full ingredients list & instructions!*
Toast the Oats and Nuts (optional step)
I’m a real believer in getting the most out of your ingredients, and whilst, yes, this is an extra step, it maximizes the flavour. So why not take the opportunity for a little flavour boost where you can in these Chocolate Granola Bars?

1. Toast the oats. Pour the oats onto a large baking tray and bake for 20 to 30 minutes, tossing halfway through until golden (Images 1 & 2). Set aside.
TIP: How golden or crisp you like them is a personal preference, so if you like them lightly toasted, then remove them after 20 minutes, or if you like them crisp, then remove them after 30 minutes.

2. Toast the hazelnuts and de-skin them. I buy my hazelnuts with the skin on and remove the skin myself. Here’s how:
Place the hazelnuts onto a baking tray and pop them into the oven along with the oats. Toast until nice and golden, and they smell nutty. Remove the pan from the oven, and using a paper towel or kitchen tea too well, rub the hazelnuts quite roughly. You’ll find that the skins fall away from the nuts (Images 3 & 4).
If any remain, don’t worry about it. Once cool, roughly chop half and set the other half aside, leaving them whole.
Make the Date Paste
This paste is the ‘glue’ needed to bring together the oats and nuts. Too little, and the Chocolate Granola Bars will crumble apart. Too much, and they’ll be too sweet and soft.

3. Make the paste. Add dates, peanut butter, whole hazelnuts, maple syrup, coconut oil, water, and salt in a food processor's bowl. Blend until smooth and thick, scraping the base and sides of the bowl halfway through (Images 5 & 6).
Make the Granola Bar Mix

4. Mix toasted oats and hazelnuts together. In a large mixing bowl, add the toasted oats, roughly chopped hazelnuts, and cocoa powder and mix it well to remove any lumps from the cocoa powder.
5. Add date mix to the dry ingredients. Scoop the date mix into the mixing bowl with the oats and use a wooden spoon, rubber spatula, or even your hands to incorporate the paste into the oats (Images 7 & 8).
It will take a few minutes. Make sure there are no dry bits in the bottom of the bowl or clumps of paste. You really need to work it through.
6. Prepare your baking pan. Normally I say to grease the base and sides fully with butter before adding the parchment paper. But as these won't be baked but refrigerated instead, just add a little blob of butter on the bottom and each side of the pan. This stops the paper from moving around.
Make sure it overhangs the side to create a sling to lift the Chocolate Granola Bars out of the pan later on.

7. Add to prepared pan and refrigerate. Spoon the granola mixture into the prepared pan, and using the bottom of a cup or your hands, press it down into an even layer. I use an offset spatula to smooth it out and get it into all the corners (Images 9 & 10).
TIP: The granola mixture needs to be pressed down enough for it to compact and stick together, but not so much that you turn it into mush!!
Refrigerate. These Chocolate Granola Bars ideally need a minimum of two hours to firm up in the fridge, but leaving them overnight is also a good option.

8. Cut and decorate. Once the oatmeal chocolate bars have firmed up, lift them out of the pan using the paper overhang. On a chopping board, slice them in half and then each into six bars (Image 11).
Decorate with dark chocolate. My little bit of indulgence! Heat the dark chocolate in a microwave in 20-second bursts stirring between each burst, until fully melted. Spoon into a sandwich bag, snip the corner off and drizzle over the bars (Image 12).
🥣 How To Serve
Wait until the chocolate has solidified, and enjoy! (But really - you can gobble one straight up with the melty chocolate over the top!)
You can enjoy these running out of the door in the morning for breakfast or add them to your kid's lunch box (if your school isn't a nut-free zone).
Alternatively, when you get that mid-afternoon lull or post-dinner cravings - these chocolate granola bars fit the bill.
💭 Recipe Pro Tips
- Chopping the hazelnuts. Chopping nuts can be tricky, with them sliding all over the place. You have to use your food processor for this recipe, so why not add the whole hazelnuts into the bowl, pulse them a couple of times, and then remove them? Do this before making the paste.
- Don't grease the pan fully with butter. As these are refrigerated, the butter will solidify, making it hard to use the paper to lift out the bars. Just a couple of blobs to stop the paper from moving.
- Loosen the date paste. If you find the date paste too thick, add a tablespoon of warm water - this will instantly help loosen it up.
- Get your hands sticky if you need to! When combining the date paste with the oat mixture - if you find it hard to incorporate with a spoon, then use your hands and massage the two together. Hands are sometimes the best tools we have!
- Melt the chocolate in bursts. There's only a small amount of chocolate needed, so make sure to melt it in small bursts in the microwave and stir otherwise, you'll burn it to smithereens.

📋 Recipe FAQs
The date and maple syrup mixture act as the glue to these bars. Too little and the bars will crumble, but too much and the bars will be gluggy. These have just the right amount.
As mentioned above, it's because there aren't enough ingredients needed to bind the oats and nuts together. Make sure to weigh your ingredients using a digital scale for accurate results. Too few dates, maple syrup, or peanut butter, or too many oats will affect the final result.
Absolutely. This is the only way that you'll get these bars to set. The coconut oil in the bars re-solidifies and helps them maintain their shape.
❄️ Storage and Freezer Instructions
To store: The Chocolate Breakfast Bars store incredibly well. Once the dark chocolate has solidified, then store it in an airtight container for up to 1 week. Or refrigerate for up to 2 weeks.
To freeze: Lay parchment paper between bars and place in an airtight, freezer-safe container. Freeze for up to 3 months. Thaw at room temperature.
😋 More Delicious Bar Recipes


If you tried this Chocolate Granola Bar Recipe or any other recipe on my website, please let me know how you go in the comments below. I love hearing from you.
📖 Recipe

Chocolate Granola Bars Recipe
Equipment
Ingredients
- 270 g rolled oats
- 140 g whole hazelnuts
- 160 g Medjool dates, pitted
- 120 ml maple syrup,
- 80 g smooth peanut butter , (or any nut butter if preferred)
- 30 ml coconut oil
- 45 ml water
- ¼ teaspoon fine salt
- 30 g cocoa powder
Topping
- 50 g dark chocolate
Instructions
- Toast the oats. Pre-heat oven to 180°C (350°F). Pour oats onto a baking tray and spread out evenly. Bake in the oven for 20 minutes, stirring halfway through, until toasted and golden. Remove from the oven and set aside.
- Toast the hazelnuts and de-skin them. Place hazelnuts onto a separate baking tray and bake for 15 minutes. (The tray can go into the oven at the same time as the oats). Remove the hazelnuts tray from the oven and allow to cool slightly. Using a paper towel, tea towel or between your fingers, rub the hazelnuts, and the skins will come off easily. Do this until the majority of the skins have been removed. Divide the hazelnuts in two and roughly chop half the hazelnuts and set them aside.
- Make the paste. In a food processor, add the dates, peanut butter, maple syrup, coconut oil, water, salt, and whole hazelnuts, and whizz up until a paste has been created.
- Mix toasted oats and hazelnuts together. Into a large mixing bowl, add the toasted oats, cocoa powder, and remaining chopped hazelnuts and stir until fully combined.
- Add date mix to the dry ingredients. Scoop the date mix into the mixing bowl with the oats and use a wooden spoon, rubber spatula or even your hands to incorporate the paste into the oats thorougly.
- Prepare your baking pan. Line a 23cm (9x9-inch) square baking pan with parchment paper. To help it stick, add a couple of dabs of butter to the base and sides of the pan. Let the paper overhang to use as a sling later.
- Add to prepared pan and refrigerate. Pour the mixture into the prepared pan and using the back of a spoon or your fingers, press the mixture down firmly until it’s level and fairly compact. Refrigerate for a couple of hours until the bars are firm.
- Cut and decorate. Lift the bars out of the pan using the paper overhang. Slice the square in half and then each half into 6 bars. To serve, melt the dark chocolate in 20 second increments in the microwave. Stir after each burst. Drizzle the melted chocolate over the top of the bars.
All recipes are developed and tested in Metric grams. I strongly recommend that you bake using digital scales for a more accurate result. I have provided a conversion to US customary in the recipe but please note that I haven’t tested using this method.
Notes
Nutrition
This post was originally published in August 2019 but has been updated with new photos, new content, and a revised recipe.


Anna says
Loving the look of these bars and all of the ingredients you've used Emma! They would make a great alternative to some overpriced and not so tasty bars I buy in the shop! 😉
Emma says
You’re totally right Anna! Tasty and not ‘bad’ for you - winning all the way right?!! x
Eileen says
SO delicious and SO easy to make!! The hardest part is waiting for them to chill before eating 🙂
Emma says
I know right-it’s so tempting to eat before they are chilled...but worth the wait!
Heena says
Oh my word!! These are super easy to make and they are delicious and certainly a winner for all the family!
I used pecans as I didn’t have hazelnuts but it doesn’t matter they are divine 😃!
Emma says
Great idea to sub the hazelnuts with pecans. Walnuts would be a good sub too. x
Christine says
These were soooo delicious. They didn’t set quite as well as I had hoped and crumbled a bit. Any suggestions for a firmer bar?
Emma says
Hi Christine, So happy that you enjoyed the bars. The oats might have been measured out slightly differently...cups / grams produce slightly different results.Too many oats might make the mixture drier and then not stick together. xx
Jo says
Hi
Can you freeze these bars? Thank you x
Emma says
Hi Joanne- to be honest, I have never frozen these before (they get eaten too quickly in my house!) Let me know how you go if you do.
Mayanka says
Hi Emma ,
Any replacement for maple syrup it’s not readily available here
Thanks
Mayanka
Emma says
Hi Mayanka- You could use runny honey but I haven't tested it with this- the flavour will change as it's a different product but in terms of texture for the bars- it will remain the same. Emma
Beena says
Hi. I’d like to try this recipe but I can’t see where you add the coconut oil. I assume it’s to the date mixture but I thought I’d check first. Thanks.
Emma says
Hi Beena- you are correct, it gets added into the paste. I hope you enjoy the bars.